


Here we’ll dive in to configuring a typical Hyper-V server from scratch scenario — a Dell R730xd Hyper-V SanDisk DAS Cache. We’ll be taking advantage of using SSDs and SanDisk DAS Cache, with some spinning rust for the slower high-capacity storage. The proven idea is that the SSDs will handle the bulk of the IOPS load instead of the slow spinning drives.
There are many ways to configure an R730xd. How you do so is determined by your needs. For this post, and the needs of this specific configuration, it’s a fairly simple and straight forward setup.
The Purpose
- Replace an existing overly-aging physical server that is hosting highly-critical line-of-business data, services, and applications.
- Easily allow expansion due to newly obtained business contracts and possible acquisitions.
The Requirements
- Price: needs to be balanced
- Host multiple VM’s:
- Infrastructure VM’s (DC, DNS, DHCP, Print, file services)
- Application VM’s (MS SQL (light load at first), accounting, and inventory software)
- Storage:
- Needs to take over existing data:
- roughly 1 TB
- Needs to handle an immediate influx of data due to upcoming projects, newly obtained business contracts, and possible acquisitions:
- estimated 500 GB
- Must have ability for expansion, and lots of room for expansion
- Needs to take over existing data:
- Memory:
- Needs enough memory for current needs
- Must have room for expansion
The Hardware Specifications
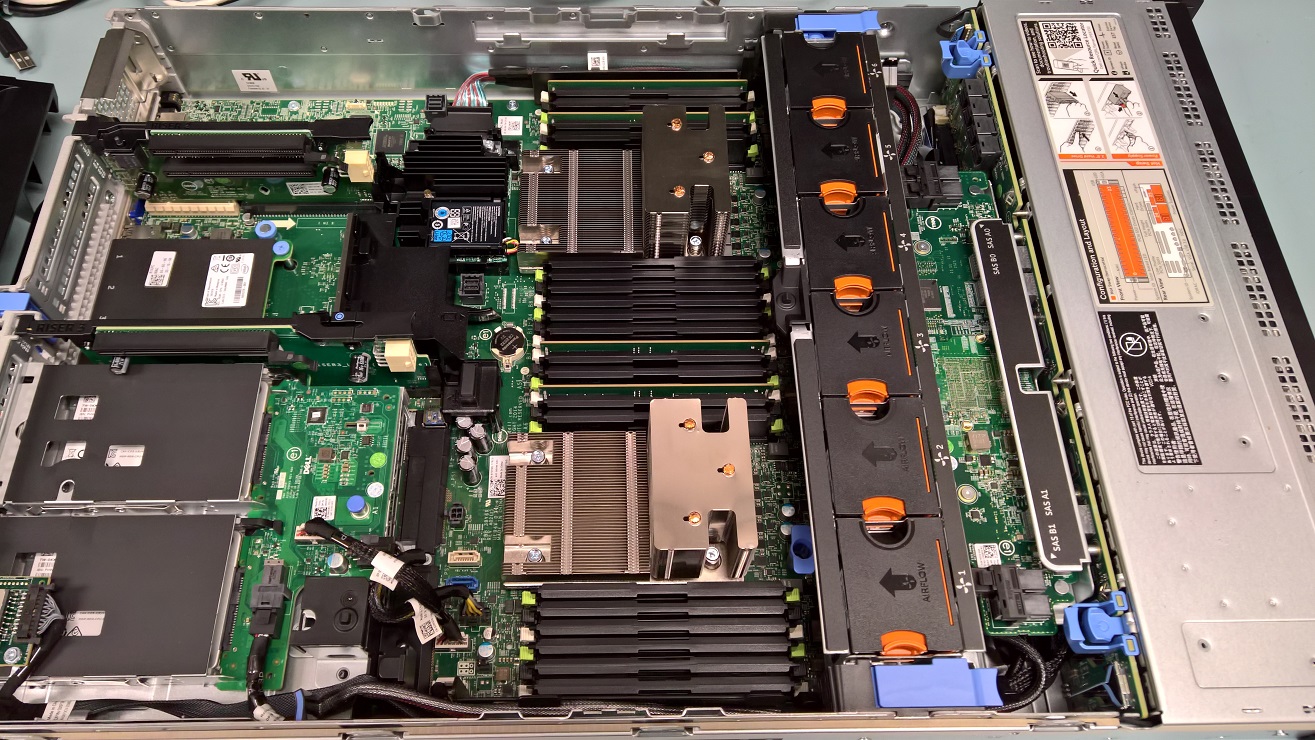
- 2x Intel Xeon E5-2620 v4 8C/16T CPUs
- 64 GB RAM
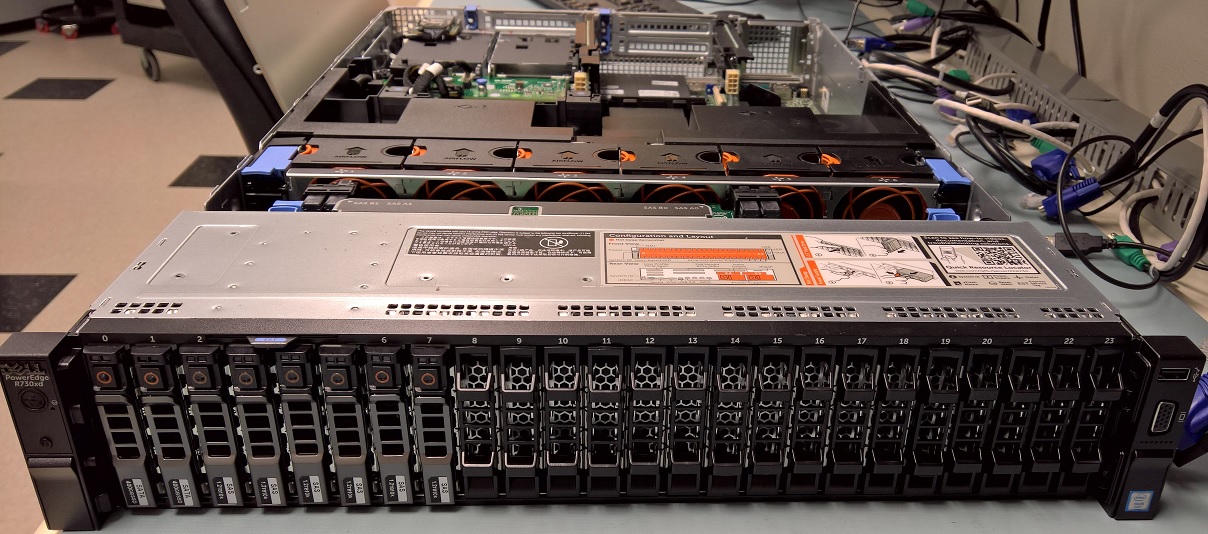
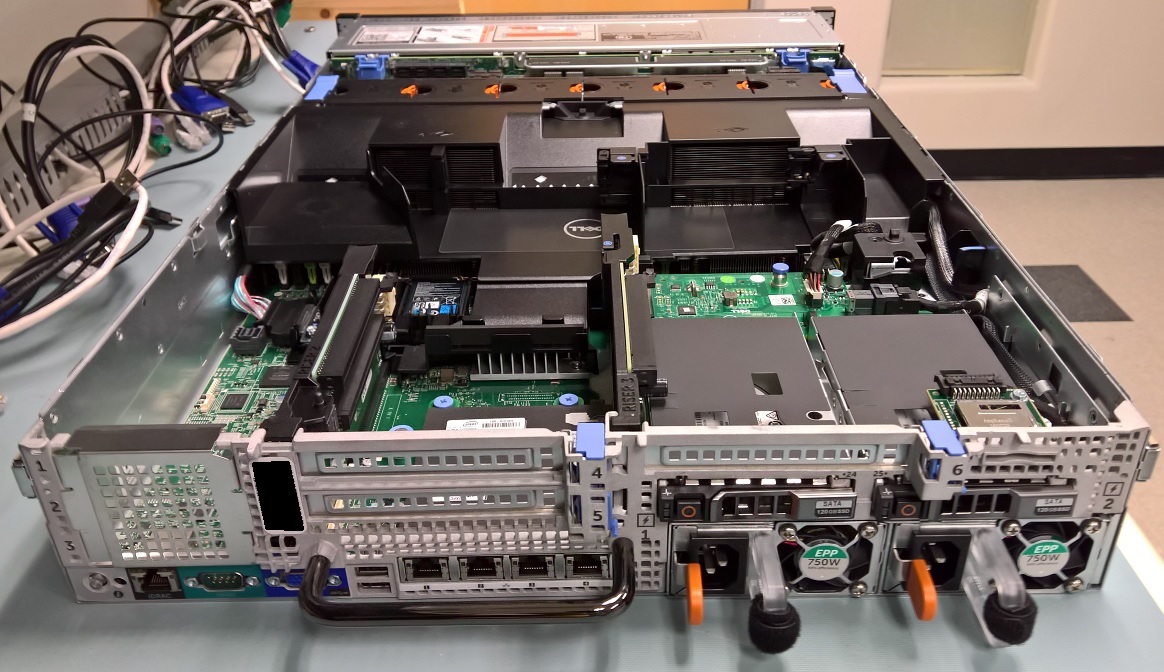
- 24x 2.5-inch bay chassis with 2x 2.5-inch flex bays (in the back)
- 2x 120 GB SSDs RAID 1 for Hypervisor OS (because it was cheaper than two 7200 RPM drives)
- 2x 400 GB SATA SSDs RAID 1 for read/write caching (using SanDisk DAS Cache)
- 6x 1.2 TB 10k SAS drives RAID 10 for all storage (about 3.2 TB usable storage – ReFS)
- OS: Windows Server 2016 Standard
Initial Configuration
On first boot, configure iDRAC to use DHCP, so it grabs a proper IP allowing you to connect remotely from the convenience of your desk and comfy chair.
Firmware Updates
Chances are that your new R730xd comes with the most recent firmware installed for all hardware. I still recommend and insist on checking anyways.
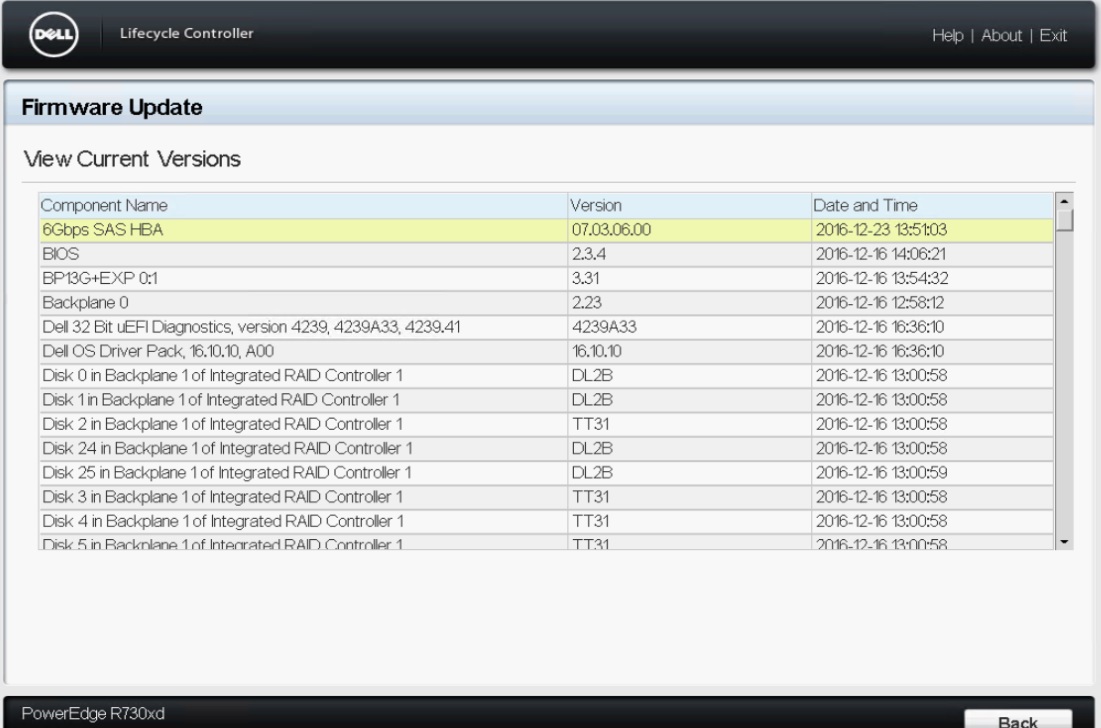
Checking Firmware Versions
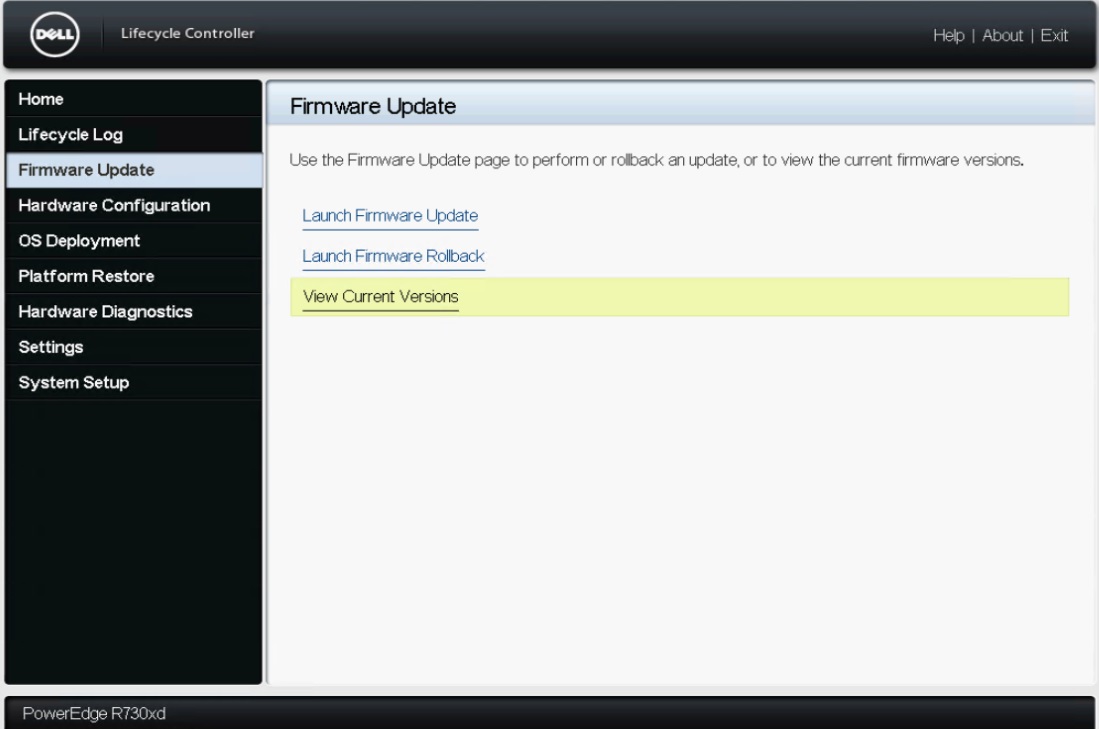
- In the Dell Lifecycle Controller, select “Firmware Update” and then “View Current Versions”. Now cross-reference that list with what’s available for your server at http://support.dell.com.

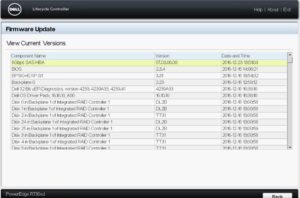
- If newer firmware is available, download it and hit the “Launch Firmware Update” link as pictured in the above screen shot. At the time of this writing, all firmware in my case is up to date. You may also use the Dell Server Update Utility after installing Windows.
Dell Server Update Utility
You may use the Dell Server Update Utility to automatically check and update all hardware firmware and drivers after the OS is loaded.
Download this utility from Dell, and mount the ISO on the server to run it. It’s a very nice utility which makes checking and updating firmware and drivers a lot easier.
Configure Settings
- I’ll leave this part up to you, as BIOS and all other hardware settings will be different depending on your environment and policies.
RAID Configuration
At boot, in the Dell Lifecycle Controller, go in to “Hardware Configuration” -> “Configuration Wizards” -> “RAID Configuration” to configure the disks. Configure the “OSRAID” here first. Then configure the other RAIDs later after the OS and Dell OMSA are loaded.
Once the OS is loaded, all firmware and drivers are updated, and Dell OpenManage Server Administrator is installed (OMSA), use OMSA to create and configure the two other RAIDs… the CACHERAID and DATARAID as described below, using the “Create Virtual Disk Advanced Wizard”.
Allow all RAIDs to fully initialize. Depending on your RAID size, this could take an hour or more. In my case, it took slightly over an hour for the 3.3 TB RAID 10 to initialize.
OS Boot RAID 1
The two 120 GB 2.5-inch flex bay SSDs in the back were already pre-configured as a RAID1 out of the box. Even so, I re-created it with the Virtual Disk Name and attributes I wanted.
- Select the RAID level
- RAID 1
- Select the physical disks
- In my case it was the two 120 GB SATA SSDs
- Set the Virtual Disk Attributes
- Virtual Disk Name: OSRAID
- Size: Maximum (111.25 GB)
- Stripe Element Size: 64 KB
- Read Policy: Adaptive Read Ahead
- Write Policy: Write Back
SSD read/write Cache RAID1
This is the RAID 1 set up for the sole purpose of being a read/write cache for the bulk storage.
-
Select the RAID level
- RAID 1
-
Select the physical disks
- In my case it was the two 400 GB SATA SSDs
- Set the Virtual Disk Attributes
- Virtual Disk Name: CACHERAID
- Size: Maximum (372 GB)
- Stripe Element Size: 64 KB
- Read Policy: Read Ahead
- Write Policy: Write Back
- Leave this RAID un-formatted as a RAW volume in Windows: Do not assign a letter, do not format.
Storage RAID10
This will be the RAID 10 you set up for the purposes of VM storage. Particularly, .vhdx files, and will be best used as an ReFS volume.
-
Select the RAID level
- RAID 10
-
Select the physical disks
- In my case it was the six 1.2 TB SAS HDDs
- Set the Virtual Disk Attributes
- Virtual Disk Name: DATARAID
- Size: Maximum (3351.75 GB)
- Stripe Element Size: 64 KB
- Read Policy: Read Ahead
- Write Policy: Write Back
- Format this RAID in Windows as ReFS, 64k allocation unit size. This RAID to only be used for large .vhdx files.
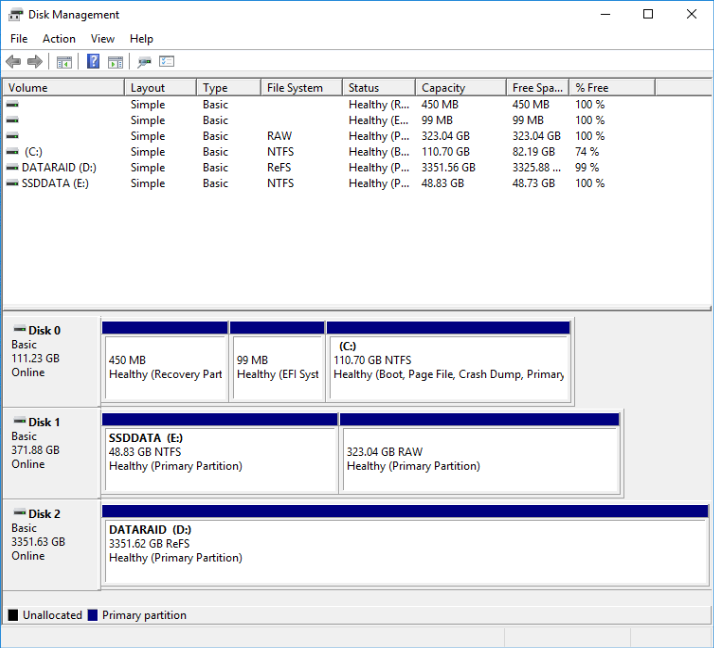
You should have something similar to the following:

OS Installation
This project requires Windows Server 2016. Install the and configure the OS as required by your environment and policies.
After the OS is installed, I recommend running the Dell Server Update Utility and installing Dell OpenManage Server Administrator (OMSA). You may use OMSA to configure the rest of the RAIDs.
SanDisk DAS Cache Install & Configure
After you have your RAIDs set up and configured, download the SanDisk DAS Cache MSI file, then run the installer. Reboot.
See below notes regarding issue with Veeam One Monitor not seeing the cache drive.
Configuring the Cache
- After the reboot, open SanDisk DAS Cache. There should be an icon on the Desktop.
- Click your local server, then the big “Configure” button.
- In the configuration wizard, select “Write-back” and the volume or partition you set up for the caching:

- If you want a read only cache, select “Write-through”.
- Select the big RAID 10 (DATARAID D:) in the “Volumes to Accelerate” selection.
- Name it something future proof, such as “DATARAID Cache 1”.
- That’s it, now you can check performance in the “Performance” tab to see your caching statistics.
- I tested it by copying the 6 GB Dell Server Update Utility to the D: drive and then copy and pasting it a few times 🙂

Hyper-V Installation & Configuration
In Server Manager, install the Hyper-V role and the Windows Server Backup feature, along with any required Admin tools.
Do not configure the Virtual Switches and Migration at this time, but do change the Default Stores to the following:
- Default location for virtual hard disk files: D:\Hyper-V\Virtual Hard Disks
- Default location for virtual machine configuration files: D:\Hyper-V
Where (D:) is the location of the big ReFS RAID 10 volume.
Reboot after Hyper-V role installation.
Configure Hyper-V
- Open up Hyper-V Manager, right-click on your server, then click “Virtual Switch Manager”.
- Create an External vSwitch for your VMs to use as needed by your environment.
- In my case, I left NIC 1 for Hypervisor management, backup, replication, etc… and used NIC 2 for the main Hyper-V vSwitch for VMs. I also did not allow the management OS to share the network adapter.
- I am not configuring NIC Teaming in this example due to environmental restrictions, so this is typically where you would set that up before creating your vSwitches in Hyper-V Manager.
- Create an External vSwitch for your VMs to use as needed by your environment.
- Right-click on your server and click “Hyper-V Settings”.
- I enabled live migrations because it is needed in my environment for this server.
- I have upped the amount of Live Migrations and Storage Migrations.
- I enabled enhanced session mode because it makes life easier and the environment and policies allow it.
- This server will not act as a replica server, so I did not enable that this time.
- I enabled live migrations because it is needed in my environment for this server.
- Add some VMs. Test away!
Extras
- Some things worth doing:
- Adding this hypervisor to Veeam ONE Monitor Free
- Back up your hypervisor
Speed Testing
If you like, you can test cached vs uncached speeds by selecting the Accelerated volume in the SanDisk DAS Cache manager, and clicking “Stop Acceleration”. Then you can run tools such as CrystalDiskMark, LAN_SpeedTest.exe, iometer, and my favorite… Diskspd Utility. Use Diskspd to get the best IOPS results.
Notes
- If you are using Veeam ONE Monitor, it will not see your cache unless you leave a small partition to format as a volume with a drive letter.
- With SanDisk DAS Cache, you can partition your CACHERAID to as many volumes as you like, and use whichever ones you want to accelerate multiple volumes. So if you want to, you can partition your CACHERAID in half (for example), keeping one RAW volume and one NTFS volume with a drive letter (E:) to use for whatever you want.
- Doing it that way, Veeam ONE will pick up your E: volume and show you your performance for that RAID. Then you can clearly see your caching doing it’s job!

- Doing it that way, Veeam ONE will pick up your E: volume and show you your performance for that RAID. Then you can clearly see your caching doing it’s job!
- With SanDisk DAS Cache, you can partition your CACHERAID to as many volumes as you like, and use whichever ones you want to accelerate multiple volumes. So if you want to, you can partition your CACHERAID in half (for example), keeping one RAW volume and one NTFS volume with a drive letter (E:) to use for whatever you want.
Hi guys, please can you help me with configuration for a same R730xd server, but i want to use for SQL Database only purpouse (productive server) using Windows Datacenter 2016 as OS. Its has 256gb ram.
I have 24 SATA SSD drives, 16 units with 480gb and the others 8 with 960gb, all drives are kingston DC500R models.
I dont know if neccesary a Cache solution here, and a recomended RAIDs config for this use.
I apreciatte your help and recomended config to use all capacities.
Regards
Claudio
Timothy,
Thank you for such a detailed post. I am about to setup R730xd to evaluate das cache… of course, your post makes my task a breeze 🙂
1. why do you want raid-10 for slow storage vs raid-6? since fast storage is critical for performance, why do we need raid-10 performance for slow storage vs getting more storage and having slower performance on raid-6?
2. for the same performance reasons, why not have raid-10 with 4 drives for fast storage to boost performance vs having raid-1?
3. In the section where you wrote the config parameters it says Write Back policy for Raid-10 slow storage but in the comments you explain that Write Through policy is fine. In the same comment you confirmed that HDDs array write performance is not needed.
Hello,
1. IIRC, RAID6 had way too much overhead for the use case, and was specifically building for safety, reliability, scaling, and yes, the write performance from the SSD tier back to the HDD tier. When I said slow storage, it was relative to the SSDs. Not slow on purpose as in choosing RAID 6 to force slow writes.
2. This didn’t really apply, as there were only two tiers. Caching, and regular storage for all VMs. The RAID1 was strictly for the caching tier (SSDs).
3. The SSD DAS cache needed to be write-back because it was a read/write cache, not a read-only cache. The RAID Card itself also has a built-in cache, which wasn’t part of the considerations at that time. I could add an extra step, but in that case it was negligible.
I should also note that the last time I checked, SanDisk DAS Cache was going EOL. I don’t think they (Dell) use it anymore.
SanDisk is no longer offering this software as it’s branded by Enmotus and is available through them and Dell. Thank you for the response.
Why run the RAID-10 (SAS 10K) with Write Through policy?
I know you have the SAN Disk Cache to also provide accel. read/write.
Hello,
In that particular setup, the SAS 10K HDDs don’t need the write performance, only read. The data on the HDDs is only meant to be read from, as all data is first written to the SSD cache, and then the SSD cache shoves it’s data to the HDDs as it gets cold, or fills up with newer data.